Compositing played a huge role in this documentary film.
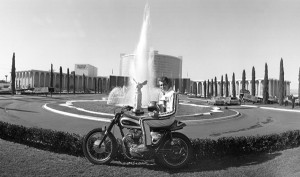
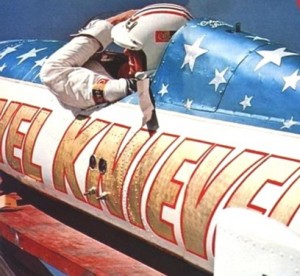
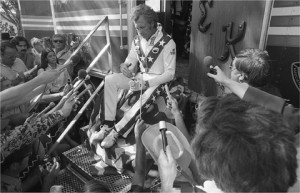
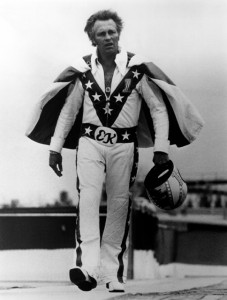
Those of us of a certain age will likely remember being glued to the TV as a child watching Evel Knievel jump his motorcycle over cars and canyons. It felt like the world held its collective breath, hoping that something horrible didn’t happen… or maybe wondering what it would be like if something did.
Well, Johnny Knoxville, of Jackass and Bad Grandpa fame, was one of those kids, as witnessed by, well, his career. Knoxville and Oscar-winning filmmaker Daniel Junge (Saving Face) combined to make Being Evel, a documentary on the daredevil’s life and career. Produced by Knoxville’s Dickhouse Productions (yup, that’s right) and HeLo, it premiered at Sundance this year.
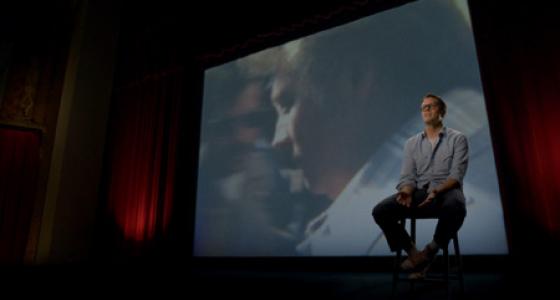
Director Junge (who shares writing credit with his editor Davis Coombe) has a little daredevil in him too, choosing to walk a bit of a tightrope when it came to how he wanted to present the film — ultimately, he ended up putting 60 interviewees in front of a greenscreen while archival clips of Knievel’s stunts played in the background. The interviews were shot all over the country in a variety of locations.
As you can imagine this format relied on post production, compositing in particular, to play a big role. So we reached out to compositor James Durée from Denver’s Milkhaus, which provided post production services for Being Evel. Milkhaus and Durée, who provided some additional animation to the film as well, have a history working with Junge and editor Davis Coombe, so they got the call early.
You were brought on before shooting began?
Yes, once Junge sold the idea, we started running some tests to see if we were going to pull off his idea of having all of the archives run on the theater screen behind the people being interviewed. So, it’s all done with greenscreen.
Production flew around the country and shot the subjects with Blackmagic Cinema Cameras, for the most part, and on various greenscreens. Then we shot plates here locally at the Paramount Theater to composite the interviews in. Then we did a composite of the archive rolling behind them for the effect.
Greenscreen shots come with their own set of challenges — what colors and clothes people are wearing, lighting, etc. — but add different screens to the equation and that takes it up a notch.
You can never really control what people are wearing! The surprising thing was the difficulty of controlling the type of greenscreen that was being provided at these locations. They were all over the place in terms of the color of green that we had to key.
Sometimes we had more than one color of green within one shot! I think in one of them there was three or four different colors, and some of them were really more blue than green. They weren’t blue or green. There were a lot of variables to play with, but, thankfully, they were great about measuring to make sure they were setting up the same way each time.
Had you experienced anything like this before?
No. They did somewhere around 60 interviews; it was quite an undertaking. I don’t think that anyone’s really done this in documentary filmmaking to this extent. There was one that came out recently that had maybe six different interviews. We had four camera angles and probably 20 to 25 interviews that were actually used within the film.
How did you go about fixing the greenscreen issues and making the composites look good?
We used Primatte, Keylight and Key Cleaner quite a bit, as well as After Effects. We also called on DaVinci Resolve. The production shot in ProRes on three Blackmagic cameras and one Canon C300. All of them were in log (so flat, shot without the Rec 709 applied, which would have made it look like video.) We used DaVinci to create look-up tables for each person and each angle to get them out of the log color space and into something that we thought we could key. It was always a fight on using these LUTs to bring them into a place where we could get a fairly clean key while not introducing too much noise and digital artifacts.
Once we had those LUTs, we would key them with any number of keyers, depending on the shot. Even though they were all in these studio settings, it always seems like some variable was making it not work like an identical shot from earlier in the frame. Then we would use DaVinci to create a second look-up table to bring it into a color where we thought was maybe 98 percent of the final color of the composite. Then we would render them out and bring them into DaVinci to do a final color pass on the full composite plates, but with the people in the environments.
We were hopping in and out of DaVinci and After Effects and Premiere quite a bit to push and pull these different shots so that in the end it all looks like they were shot in one environment.
So the film was edited in Premiere?
Yes, primarily because of the integration of Premiere and After Effects — being able to edit in multicam and also take advantage of the story scripting function, Adobe StoryYou could get transcriptions of what had been said in the interviews, so you could see the words. This allows you to jump through the footage and find what you need to start telling the story. Then they could pick the angles on the fly as they wanted.
While it was advertised more simply than it ended up being, we were able to get from Premiere into After Effects with our reels fairly easily. We then started doing the initial keys and compositing them to different plates on the footage behind them.
Can you talk more about using Primatte, Keylight, Key Cleaner? Are these automated to a point and then you have to go in and noodle?
They have an auto button, but I have yet to get it to work. Some of them are built-in plug-ins that Adobe has either licensed or bought and included in their package. Some of them are plug-ins that are sort of the industry standard. For example, Primatte is used in Nuke quite a bit for the high-end Hollywood composites, and Red Giant ported it over to be used in After Effects. It allows you to use a visual interface to start selecting the things that you don’t want or the ones you want to keep in to push and pull the different parts of the matte until you get a key.
There is still a decent amount of finessing involved?
Probably on average we were spending at least 40 minutes per angle and per person to get an initial key that we used to create presets that we would then drop in as we got that angle again later in the film. Then we would tweak them because the majority of the people in the film are older and have white hair, which just absorbs all the green around them. Their hair really wanted to go with all the background. The spill was really prevalent throughout the whole shot. Sometimes you had to tweak it around. Some of these set-ups were four or five different processes to get one clean matte to then key them.
Imagine if one of those white-haired guys showed up in a green shirt?
Ha, luckily, no one wore a green shirt, but there were some that were wearing beige suits that apparently had some green tones in them — we discovered this when we dropped a color meter on them. We did a lot of garbage matting as well, because all of these guys have glasses… anything that’s reflective. Sometimes it looks right just dropping it in, and other times you have to cut it back in because you don’t want to key off that part.
Let’s talk about the archival footage and all the different formats? I guess that’s where Premiere came in as well?
Yes, that’s helpful, but when you have to go re-conform all that for deliverables —ultimately this will get distribution through A&E and History — they’re going to want all of it in 23.98fps ProRes HD conformed frames. We had Super 8. We had HDCAM. We had Beta. We had some DVDs, some VHS. It was all over the place. Some came in already captured into a QuickTime, but they’d done it 10 years ago, so some of the codecs were just really old. We’d have to figure out what codec was being used so we could get it to run through the Blackmagic Teranex.
How were you using the Teranex?
We were using it to get it all into 23.98fps because our media was in various framerates. We did have some 18fps media that we had to telecine down the 25fps from the BBC. The 29.97fps footage was from prior TV runs like ABC‘s Wide World of Sports, and Evel Knievel had done a documentary himself and that one came in on some 1-inch tape. We were just constantly troubleshooting, trying to figure out the best way to get it into a more standard format that the Teranex could then push through and do the upresing and conversions for us.
I like Blackmagic’s latest version of Teranex because we can do at least a basic color balance before it’s even brought it in. We can make sure we capture it in a more neutral true color, which makes it easier when it comes to the final color correction.
I’m assuming the integration between Blackmagic Media Express and Teranex helped the workflow?
Yes, but ultimately you’re capturing the footage and then the editors are using it in whatever program they choose. We use Avid, Final Cut 7, Final Cut X and Premiere. Depending on what project we’re doing, we try to pick the one that we think is going to give us the best throughput for the project’s workflow. Ultimately on all of those, it’s how each system handles the hand-off in the DaVinci that makes it easier.
The Thunderbolt connection must be helpful.
Absolutely. With Thunderbolt we can plug them [the Teranex] into the new Mac Pros and capture that footage using Blackmagic’s Media Express, their capture program. It keeps the overhead on the processors down, and you see a lot less issues on capture with dropped frames and bad playback. It’s come a long way from the days of capturing from decks onto the older Macs.
The thing that I really love about the Teranex with Thunderbolt is that whatever you’ve set in the program it sets on the Teranex, so you’re not thinking that you’re capturing in one format and actually getting another. The two talk to each other and make sure they’re in sync. When you are working these long hours, fatigue sets in and you start making mistakes that you wouldn’t otherwise make. It helps to eliminate some of those potential mistakes of mismatching frame rates and codecs when you’re capturing.
Anything else that you would like to add about the workflow on Being Evel?
The entire film was greenscreened, so unless we’re showing full-frame archive, everything that you’re looking at is either done in After Effects as an animation or it’s done in After Effects as a final composite — putting people into this environment. I think it’s a pretty unique process of documentary filmmaking. Normally you set up in an office, and you shoot what you see.
This workflow, for better or worse, allows you to noodle a lot longer because you can move people around. You can really tweak what’s going on in the background. It lends a whole other layer to the storytelling. I think it’s fascinating to sit there in the theater and watch as people are talking and seeing this archive playing behind them.
Most of the archival shots of Evel Knievel are courtesy of K&K Promotions.
Thought Gallery Channel:
Creative Master Series