Creating new worlds for Amazon’s The Man in the High Castle

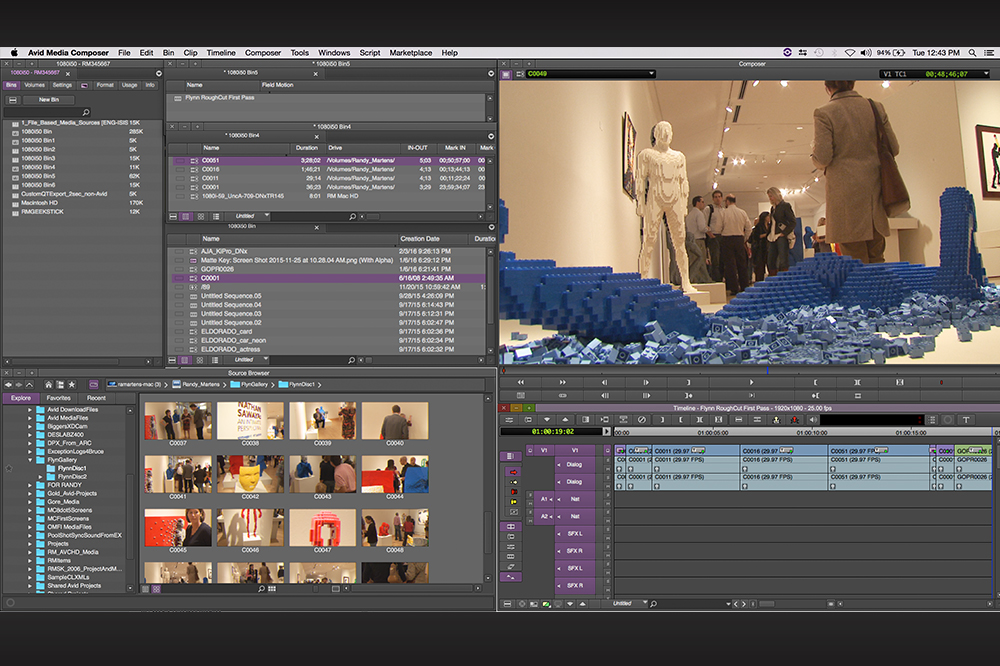
Zoic Studios used visual effects to recreate occupied New York and San Francisco.

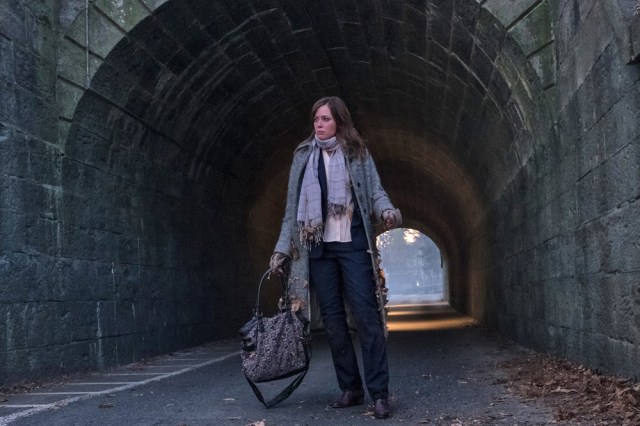
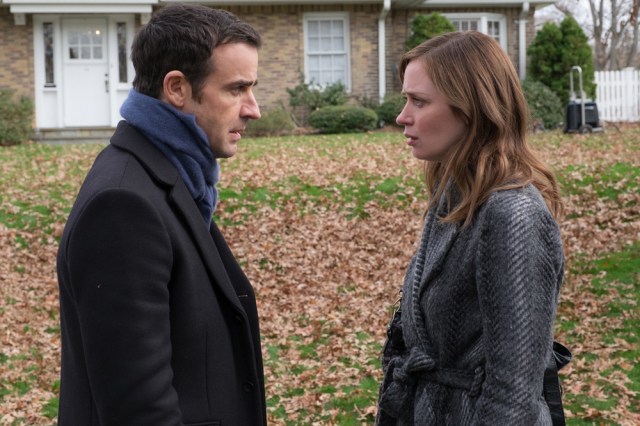
What if Germany and Japan had won World War II? What would the world look like? That is the premise of Philip K. Dick’s 1963 novel and Amazon’s series, The Man in the High Castle, which is currently gearing up for its second season premiere in December.

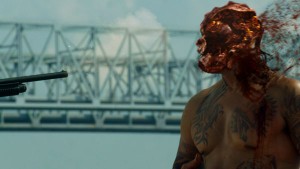
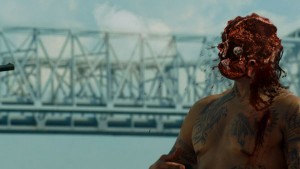
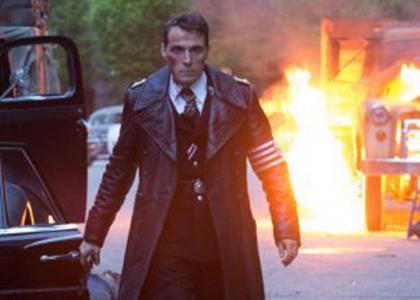
The Man in the High Castle features familiar landmarks with unfamiliar touches. For example, New York’s Time Square has its typical billboards, but sprinkled in are giant swastika banners, images of Hitler and a bizarro American flag, whose blue stripes have been replaced with yet another swastika. San Francisco, and the entire West Coast, is now under Japanese rule, complete with Japanese architecture and cultural influences. It’s actually quite chilling.
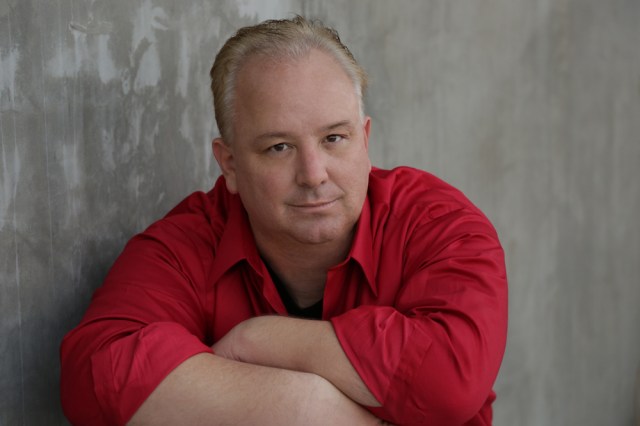
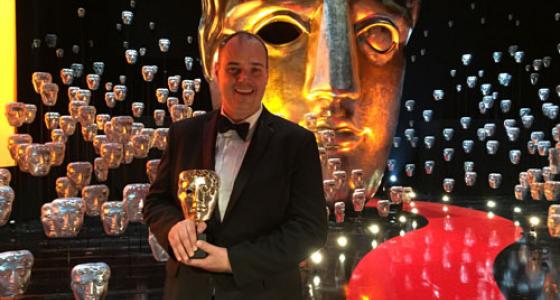
Jeff Baksinski

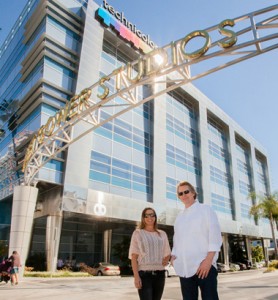
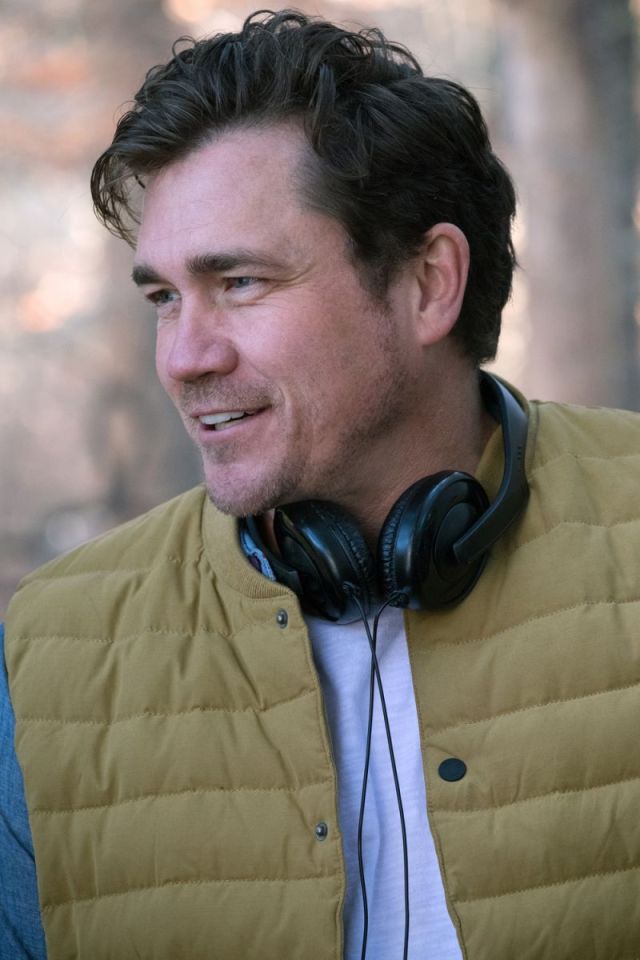
Helping to create these “new” worlds was Zoic Studios, whose team received one of the show’s four Emmy nods for its visual effects work. That team was led by visual effects supervisor Jeff Baksinski.

Zoic’s path to getting the VFX gig was a bit different than most. Instead of waiting to be called for a bid, they got aggressive… in the best possible way. “Both myself and another supervisor here, Todd Shifflett, had read Dick’s book, and we really wanted this project.”

They began with some concept stills and bouncing ideas off each other of what a German-occupied New York would look like. One of Zoic’s producers saw what they were up to and helped secure some money for a real test. “Todd found a bunch of late ‘50s/early 60’s airline commercials about traveling to New York, and strung it together as one piece. Then we added various Nazi banners, swastikas and statues. Our commercial features a pullback from a 1960s-era TV. Then we pull back to reveal a New York penthouse with a Nazi solider standing at the window. The commercial’s very static-y and beat up, but as we pull back out the window, we have a very high-resolution version of Nazi New York.”

And that, my friends, is how they got the show. Let’s find out more from Baksinski…

The Man in the High Castle is an Amazon show. Does the workflow differ from traditional broadcast shows?

Yes. For example, on our network TV shows, typically you’ll get a script each week, you’ll break it down and maybe have 10 days worth of post to execute the visual effects. Amazon and Netflix shows are different. They have a good idea of where their season is going, so you can start building assets well in advance.

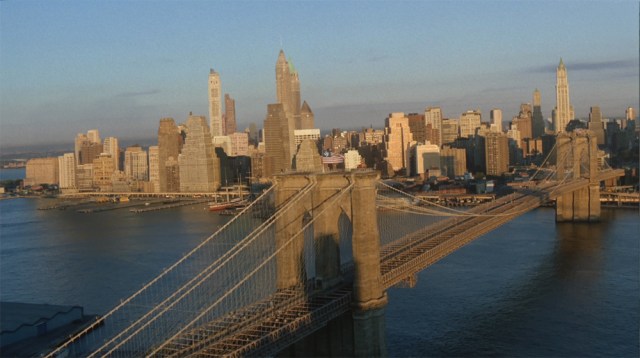
High Castle’s version of the Brooklyn Bridge
features a Nazi/American flag.

When we did the pilot, we were already building assets while I was going out to set. We were building San Francisco’s Hirohito Airport, the airplane that featured heavily in a few episodes and the cities of New York and San Francisco — a lot of that started before we ever shot a single frame.

It’s a whole new world with the streaming channels.

Everybody does it a little bit differently. Right now when we work on Netflix shows, we are working in shooting order, episode 105, 106, 107, etc., but we have the flexibility to say, “Okay, that one’s going to push longer because it’s more effects-heavy. We’re going to need four weeks on that episode and only two on this other one.” It’s very different than normal episodic TV.

Do you have a preference?

At the moment, my preference is for the online shows. I come from a features background where we had much longer schedules. Even worse, I worked in the days where movies had a year-and-a-half worth of schedule to do their visual effects. That was a different era. When I came into television, I had never seen anything this fast in my life. TV has a super quick turnaround, and obviously audiences have gotten smarter and smarter and want better and better work; television is definitely pushing closer to a features-type look.

Assuming you get more time with the pilots?

I love pilots. You get a big chunk of the story going, and a longer post schedule — six to eight weeks. We had about six weeks on Man in the High Castle, which is a good amount of time to ask, “What does this world look like, and what do they expect? In the case of High Castle, it was really about building a world. We were never going to create a giant robot. It was about how do we do make the world interesting and support our actors and story? You need time to do that.

You were creating a world that doesn’t exist, but also a period piece that takes place in the early ‘60s. Can you talk about that?

We started with what the normal versions of New York and San Francisco looked like in the ‘60s. We did a lot of sketch work, some simple modeling and planning. The next step was what would New York look like if Germany had taken over, and how would San Francisco be different under the influence of Japan?

Zoic added a Japanese feel to
San Francisco streets and buildings.

In the case of San Francisco, we found areas in other countries that have heavy Japanese populations and how they influence the architecture —so buildings that were initially built by somebody else and then altered for a Japanese feel. We used a lot of that for what you see in the San Francisco shots.

What about New York?

That was a little bit tougher, because if you’re going to reference back to Germany during the war, you have propaganda signs, but our story takes place in 1962, so you’ve got some 17 years there where the world has gotten used to this German and Nazi influence. So while those signs do exist, we scaled back and added normal signs with German names.

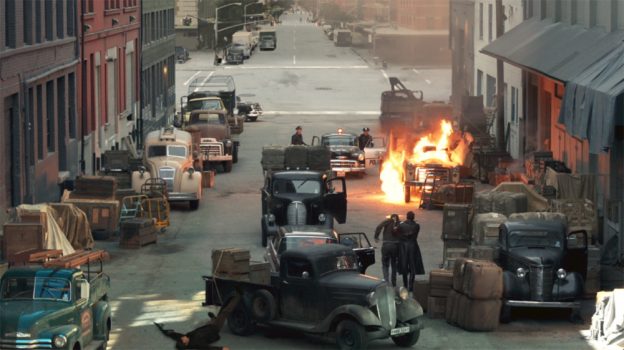
In terms of the architecture, we took some buildings down and put new ones in place. You’ll notice that in our Times Square, traffic doesn’t move as it does in real life. We altered the roads to show how traffic would move if somebody eliminated some buildings and put cross-traffic in.

You also added a little bit of German efficiency to some scenes?

Absolutely. It’s funny… in the show’s New York there are long lines of people waiting to get into various restaurants and stores, and it’s all very regimented and controlled. Compare that to San Francisco where we have people milling about everywhere and it’s overcrowded with a lot of randomness.

How much of what you guys did were matte paintings, and could those be reused?

We use a few different types of matte paintings. We have the Rocky Mountains, for example, in the Neutral Zone. Those are a series of matte paintings we did from different angles that show mountains, trees and rivers. That is reusable for the most part.

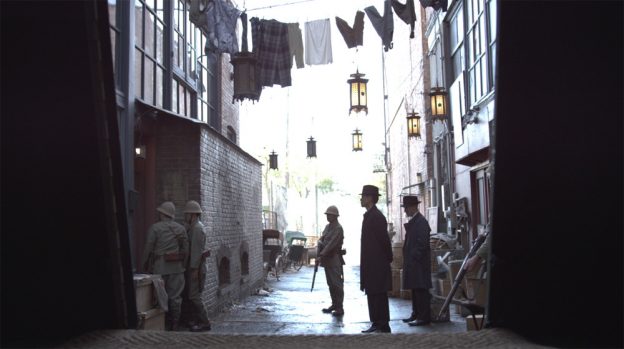
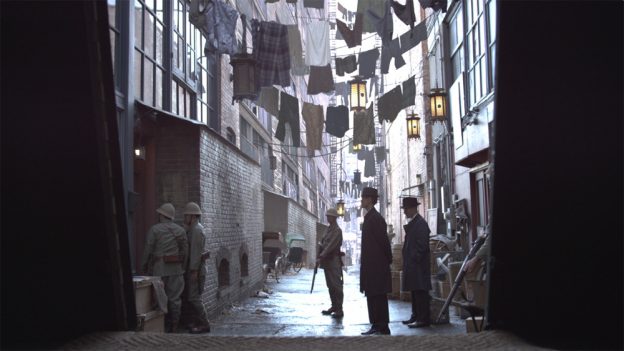
Other matte paintings are very specific. For example, in the alley outside of Frank’s apartment, you see clothes hanging out to dry, and buildings all the way down the alleyway that lead to this very crowded-looking city. Those matte paintings are shot-specific.

Then we use matte paintings to show things far off in the distance to cut off the CG. Our New York is maybe four square city blocks around in every direction. When we get down to that fourth block, we started using old film tricks — what they used to do on studio lots, where you start curving the roads, dead-ending, or pinching the roads together. There is no way we could build 30 blocks of CG in every direction. I just can’t get there, so we started curving the CG and doing little tricks so the viewer can’t tell the difference.

What was the most challenging type of effects you created for the show? Which shots are you most proud of?

We are most proud of the Hirohito Airport and the V9 rocket plane. What most people don’t realize is that there’s actually nothing there — we weren’t at a real airport and there’s no plane for the actors to interact with. The actors are literally standing on a giant set of grip pipe and crates and walking down a set of stairs. That plane looks very realistic, even super close-up. You see every bolt and hinge and everything as the actors walk out. The monorail and embassy are also cool.

What do you call on in terms of tools?

We use Maya for modeling and lighting environments and for any animation work, such as a plane flying or the cars driving. There is a plug-in for Maya called Miarmy that we used to create CG people walking around in backgrounds. Some of those shots have hundreds of extras, but it still felt a little bit thin, so we were used CG people to fill in the gaps.

What about compositing?

It’s all Nuke. A lot of our environments are combinations of Photoshop and Nuke or projections onto geometry. Nuke will actually let you use geometry and projections in 3D inside of the compositing package, so some of our compositors are doing environment work as well.

Did you do a lot of greenscreen work?

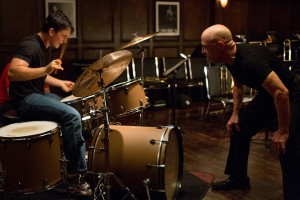
We didn’t do any on the pilot, but did on the following episodes. We decided to go all roto on the pilot because the show has such a unique lighting set-up — the way the DP wanted to light that show — that green would have completely ruined it. This is abnormal for visual effects, where everyone’s always greenscreening.

Roto is such a painstaking process.

Absolutely. Our DP Jim Hawkinson was coming off of Hannibal at the time. DPs are always super wary of visual effects supervisors because when you come on the set you’re immediately the enemy; you’re about to tell them how to screw up all their lighting (smiles).

He said very clearly, “This is how I like to use light, and these are the paintings and the artwork.” This is the stuff I really enjoy. Between talking to him and director David Semel, and knowing that it was an RSA project, your brain immediately starts going to things like Blade Runner. You’re just listening to the conversations. It’s like, “Oh, this is not straightforward. They’re going to have a very contrast-y, smoky look to this show.”

We did use greenscreen on the rest of the episodes because we had less time. So out of necessity we used green.

What about rendering?

We use V-Ray, which is a global illumination renderer. We’d go out and take HDR images of the entire area for lighting and capture all of the DPs lights — that’s what’s most important to me. The DP set up his lights for a reason. I want to capture as much of his lighting as humanly possible so when I need to add a building or car into the shot, I’m using his lighting to light it.

It’s a starting point because you usually build a little bit on top of that, but that’s typically what we do. We get our HDRs, we bring them into Maya, we light the scene inside of Maya, then we render through V-Ray, and it all gets composited together.

Thought Gallery Channel:
Creative Master Series

What Does It Mean To Be a Filmmaker?

Not too long ago, being a filmmaker meant a very specific thing, and becoming one meant going down a very specific career path. In the days before smart phones, people who wanted to make films went to film school to learn the craft of filmmaking and how to use the tools.  After graduating, they found work on a crew as a production assistant and worked their way up by proving themselves to be both capable and talented. That’s a massive oversimplification and generalization, but this “path” was very much a reality for filmmakers.

Flash-forward to today and that approach is almost completely gone. Sure, amazing film schools still exist, but the actual need to go down this path is becoming less and less. In the days when aspiring filmmakers went to film school, students lined up because the classroom environment was the only place they had the opportunity to get their hands on the necessary filmmaking tools, such as expensive cameras and hourly editing suites.

Today though, young filmmakers know they already have all the tools they need to shoot, cut and deliver content. Unlike other industries, filmmakers don’t have anything analogous to the Thiel Fellowship, encouraging students to drop out of school and pursue their own work, although its likely a moot point with fewer young filmmakers going down that path to begin with. They’re already learning how to be filmmakers from the moment they start playing around with their parent’s smart phone. Eight-year old kids are creating impressive projects with little more than the cameras on their phones, but so are professionals.

This isn’t to convince you that there’s no merit in going to film school. Off the top of my head I can think of numerous schools (not just USC) that have tremendous programs that are worth the time and effort. The point is that with or without this education, people of all ages and experience can and are getting creative behind the camera, and that fact has changed the paradigm.

Filmmaking tools have been democratized to a degree that few could imagine even a decade ago, redefining what it means to be a filmmaker. Filmmakers aren’t just making films any longer; they’re turning themselves into YouTube stars and creating five-second films. This content might not make them filmmakers in the traditional sense, but that’s only if we’re using an outdated term to describe such incredible and unique visual efforts.  

All of which goes back to the question of what it means to be a filmmaker today, because whether we want to admit it or not, the term is ripe for reinterpretation. YouTube stars aside, commercial directors will typically refer to themselves as filmmakers, regardless of the amount of films they’ve actually made. They’re telling a story with the camera, and that’s the reality for filmmakers whether they’re shooting a major motion picture or a car commercial or a project that only lasts a few seconds.

As Larry Jordan has said, we need to change with the technology, but we also need to change with the environment. Being a filmmaker isn’t just about having an idea or knowing how to focus pull. It’s about being able to create something that resonates with an audience. It’s about being able to tell a story in a powerful way. It’s about using whatever resources are available to you to bring your idea to life. That last part is key, because it’s only recently that those resources are both incredibly powerful and widely available.

The term “filmmaker” has evolved before our eyes, and it’s time we embraced it. The word “film” is obviously embedded in there, but being a filmmaker is about so much more than working on or pursuing feature work. Plus, few professionals use actual film any longer, and that number is only going to get less and less.  

For as much as I’ve talked about the film school career path that used to define filmmakers, there never was a set path to success, just like there isn’t now. But what there is now is a lot more opportunity to create something relevant. There’s more opportunity to get a project in front of people. There’s opportunity to build an audience and showcase what you can do. There’s opportunity for literally anyone to create and tell a story in a powerful way.    

This isn’t to tell anyone that they need to follow their passion. That’s a given. But doing so today as a filmmaker can mean going down various paths. For some that means film school. For others that means working on their own film projects. For others it means collaborating with friends to create content designed for YouTube. And for others it means something totally different. To be a filmmaker today, all that matters is that someone can embrace the endless opportunities to create something with little more than a smart phone and some free software applications.

It’s also important to remember that these advancements are relevant to everyone. With technology like VR on the horizon, how filmmakers think of and interpret the camera is going to be a topic of conversation. Does that mean filmmakers will need to take a completely different approach? Or does it mean they need to get a better understanding of the capabilities? Does it mean they need to reconsider their story? The answer in all of these cases is “yes”, and while the fallout from some of those answers will be more successful than others, what’s essential to remember is that the experiences in success and failure are all that really matters. Those experiences can be used for the next project, because the filmmaker who isn’t thinking about their next project has already made their last one.

Filmmakers have always creatively evolved as their careers progressed. Filmmakers today simply need to acknowledge and understand that this evolution won’t just be about them, but about the tools they use as well as the industry itself.

Thought Gallery Channel:
Creative Master Series

The color of Terrence Malick’s ‘Knight of Cups’

Terrence Malick’s Knight of Cups, which premiered at the Berlin Film Festival in early February, has literally been years in the making. Shot in 2012, on 35mm, 65mm and a variety of digital formats, Knight of Cups has had a two-year post-production cycle.

For the film, which stars Christian Bale as a Hollywood screenwriter having a sort of crisis of conscious, the director called on frequent collaborators, such as cinematographer Emmanuel Lubezki, who has a brand-new shiny Oscar for his work on Birdman, and Modern VideoFilm colorist Bryan McMahan, who also graded Malick’s Tree of Life and The New World, among other titles.

McMahan’s relationship with both Malick and Lubezki (also known by his nickname, Chivo) goes back about 15 years. That is a level of comfort that is hard to quantify.

We reached out to McMahan to learn more about Knight of Cup s— its workflow and his process grading dailies as well as the final product.

When did you start work on the film?

They had me do the dailies two years ago when they shot it so we could keep the color all the way through. This was very interesting to me because it had been 30 years since I had done feature dailies, but it worked out well.

Thirty years? The technology’s changed quite a bit since then!

Yeah, a little bit! Thinking back to the last time I did film dailies, it was with a work print and one-strip mag… that was quite a while ago.

Bryan McMahan in his grading suite at Modern.

How did you enjoy this version of dailies?

It used to be that dailies were where you got started in video. Color was very primitive back then, so it was like a starting position because there wasn’t much to do other than lace it up and let it go. Now, dailies are more technical than any part of the process.

But I enjoyed it. I was learning new stuff, and it was fun. I didn’t care for the hours (he laughs), but other than that, it was okay.

So filming began almost three years ago?

Yes, around this time three years ago, Terry shot two films — Knight of Cups and a yet unnamed title —back-to-back with about one month in between the two shoots. Knight of Cups was shot in LA, while the other unrelated film was shot in Austin, Texas.

Each shoot was about 45-50 days long so, all in all, it lasted about four months, and then Terry went into edits — he edits for quite a while.

When they were shooting, were they setting looks on set?

Yeah. Not necessarily on set. I was doing the dailies, and the reason I was doing the dailies was to have more of a final color. They didn’t have the time to do on-set color and things like that; they were shooting like crazy.

Can you talk about the workflow?

I was in communication with Chivo on a daily basis. We had a look that we were going for, but I would send him stills every day so he could get an eye on what I was doing, and then we would talk.

We wanted to get it very close to the final, because sometimes a director will go into edits for a year and get used to the look of dailies. Sometimes a director might even cut to them so it could inspire how he cuts the film. Then when he gets to the final color, if things were just done loosely and not very accurately, it completely throws it off. He’s used to the way it has looked for a year.

It’s better if we can get the color very close in the beginning, then when it comes to doing the DI, it’s a much smoother process.

What was the look Malick wanted?

Terry goes for what he calls a “no-look look.” He doesn’t want it to be warm or cold or especially moody, or light, or anything. He wants it to look as if you were looking through a window. It just should be very natural, which actually is a lot harder to achieve than giving something a look.

Let’s dig into the multiple camera formats used on the film. How many were there?

Both of the films were shot on 35mm, some 65mm, Arri, GoPro, and a little bit with Red and Blackmagic. GoPro, obviously, has a slightly different look, but it cuts in really well with 35mm, 4K and 65mm. It is amazing how well it works. It’s important to note that Terry shoots with the different cameras to achieve those slightly different looks.

What were your specific challenges relating to the different formats?

In the DI process it’s a little challenging, just because everything has a different resolution, everything’s a different size, so that becomes a little bit of a workflow — you just have to pay much more attention. Other than that, it worked out very well.

How did you work with those formats within the DaVinci Resolve?

When we did the conform in the Resolve, I grouped all the film shots and gave them a set of nodes, or a look and a sizing. I used colored flags, so I knew what every shot was as I was going through it.

Once I was cutting it together, once it was conformed, it already had the correct sizing, the correct look-up table, the correct overall color and things like that, so it actually worked out very well.

This was a 4K grade?

Yes, and the workflow is the same as 2K, other than needing a 4K projector and making sure the equipment is fast enough. But for me, it’s just a matter of looking at a picture. I don’t really treat a 4K job any differently than a 2K job.

Was there a particular shot or anything about Knight of Cups that stands out or was challenging in some way?

Well, it’s a Terry Malick movie that was shot by Chivo; it’s beautiful stuff. It’s amazing just to sit and watch. I’m lucky to be able to work with these guys. They’re beautiful pictures.

Challenging? The only challenging thing is that we did this all in clip mode, so everything was in its raw source. There’s two ways you can work on most of these boxes, and in Resolve, they call it either a sequence mode (everything in one sequence) or a clip mode (in its raw form where SAN is pointing to all the different cameras clips). Clip mode is becoming more and more the norm.

There were certain scenes, such as the ones in nightclubs, where I’m glad I had the raw because I had to go in and change the color temperature settings and exposure settings.

Are you done with the second “untitled” film yet?

Yes, we just finished the second one. There’s talk that Terry may want to do some changes, I don’t know yet, but overall we have finished both of them.

Thought Gallery Channel:
Creative Master Series

‘Banshee’ associate producer Gwyn Shovelski talks VFX

For those of you lucky enough to have discovered Banshee on Cinemax, you know just how fun a ride it can be… and just how violent. The amount of blood spilled would make Quentin Tarantino proud.

The show recently finished its third season run of action-packed goodness, and while the episodes featured many in-your-face visual effects — I urge you to search for “Chayton’s Death Scene” on YouTube — courtesy of Zoic Studios, there were also many effects that were just, well, face effects.

If you are a viewer, you know that most of the characters aren’t who they appear to be, and the audience is let in on their back stories via flashbacks. That is where Technicolor Flame artist Paul Hill comes in… de-aging for a few cast members in a digital yet seamless way. (Keep an eye out in this space shortly for our interview with Paul Hill.)

But that’s not all Technicolor provides, says the show’s associate producer, Gwyn Shovelski (@gshove00). She typically hands Hill 50-plus shots per episode, ranging from a modesty patch (it is Cinemax so there might be a lot of these) to costume fixes, monitor comps, cosmetic fixes, de-aging, boom shadows, muzzle flash additions, crew and/or equipment removal, reflections and flares.

“Some of the heavy flashback episodes, though, could have as many as 100 shots just of de-aging,” she explains. “As for Zoic (which handles the more heavy visual effects), we can have as little as five to 150 shots, depending on the action of the episode.”

When it comes to picking and choosing which studio gets which shot, she breaks it down like this: “Anything extensive, like a CG vehicle flip, blood enhancement, debris hits, heads or other body parts being blown off, typically goes to a visual effects house, and in the case of Banshee, we go to Zoic, which have the resources to complete the shots in a timely manner for broadcast cable television.” Shots more on the 2D scale that are in need of augmentation are handed off to Hill who works directly off the file at Technicolor — meaning there is no additional data management.

Zoic’s work on the Chayton Death Scene.

In terms of workflow, after the HD show is assembled, Shovelski does a review with the Technicolor editor Ray Miller, who works on Avid Symphony 6.5. “A more extensive QC of the uncolored show follows; this is where I generate a list of shots for Paul to work from. At this time I can also catch possible missed Zoic VFX shots we would have spotted in editorial using DNX36 as our source material.”

Before handing off the list to Paul, she goes into the color-timing bay — working with Gareth Cook on the DaVinci Resolve 11 — to see if she can eliminate a few shots. “Our show is pretty dark, which becomes advantageous in that you won’t see, for example, reflections or modesty patches with final color,” she explains.

Before and After: Technicolor’s Paul Hill de-ages characters in Flame.

Hill then takes the DPX file into Flame 2015 and works from the uncolored material. Once he has completed the episodic list, Shovelski reviews each shot and gives notes as needed. “We’ve worked together for several years now, including on HBO’s True Blood, so he pretty much knows how far I want him to go on a shot. The number one advantage to our workflow is that all artists (editor, Flame, color) work simultaneously off one file. Paul literally shows me the shots in his bay where I approve on the spot or ask for more or less. He then does an export and I render the shots back into the color-timed master.

“The Zoic approval process is more extensive given the need to send a bin to editorial for the assistant editor to pull into the Avid,” she continues. “Allen (co-producer/head of post production Allen Marshall Palmer) and myself give notes or approve before they send the final shots to Technicolor to drop in and color.”

Whether the effect is benign or over-the-top, it’s always part of the show’s fun ride. Banshee has been renewed for a fourth season, which will begin airing in 2016. So you have some time to binge and catch up.

Thought Gallery Channel:
Creative Master Series

FotoKem colorist Mark Griffith: digital remastering ‘The Sound of Music’

Who doesn’t love The Sound of Music? Who? Introduce them to me and we’ll talk. Fifty years after it was released in theaters, this classic film about — well, you know what it’s about — was restored by Burbank’s Fotokem, home to one of the last feature film labs in the country. The studio completed the restoration of the 65mm musical through 8K scans from large-format film elements, downsampled to 4K for restoration and digital cinema mastering.

For the restoration of The Sound of Music, which was directed by Robert Wise and photographed by Ted D. McCord, ASC, Andrew Oran and his team began by creating the highest quality 65mm intermediate film components possible on the facility’s re-engineered 65mm contact printers. Next, those film elements were digitized at 8K on the 65mm Imagica scanner. FotoKem colorist Mark Griffith mastered the film from re-scaled 4K files, using digital tools to address quality issues present in the sourced material, such as flicker and variable color fading.

Mark Griffith

We decided to reach out to Griffith to find out more…

When Twentieth Century Fox came to you, what direction did they offer? 

It was their intention to emulate film — even though the restoration process was in digital 4K, the final deliverable was a DCP and everything was done in the film color space. This gives the viewer an experience of what a restored film print would look like.

Did they want you to take some liberties based on what new technology was available?

We used the latest technology, but we used it gently. When I am at work on a restoration, I simply adopt a different mindset. Color tools that would be used for creative color in a new release are used as corrective tools in a restoration. In The Sound Of Music, our main task was to tackle anything that might be visually distracting, so I used windows and secondary correction with more of a corrective approach. In a way, a restoration is the ultimate visual effect. Every frame has an issue, and FotoKem’s role was to determine the best way to make it new again.

What did you use as a reference for what director Robert Wise and DP Ted McCord, ASC, intended?

We had a print that director Robert Wise had timed. However, time had taken its toll on the element. For example, the scene where Maria first meets the Von Trapp children was extremely red. It wasn’t a very flattering image. So during our remastering, I concentrated on balancing color and keeping the look natural and filmic.

We also referenced various other remastered versions — such as a previous DVD version and videotape elements of The Sound of Music — and the studio would comment on what they liked or didn’t like about each element. My role was to distill what was visually important.

How much of the film was damaged?

The film had an extensive amount of damage in the form of dirt, scratches and fading, and the color balance was inconsistent. I commonly had many different color corrections going on throughout a single shot. Adding to the challenge, each time we successfully solved an issue or refined an image a new visual challenge appeared. Frame by frame, we carefully determined the best way to make it new again.

What were some scenes that needed the most work? 

At times, the first and last frame of every cut had a timing misfire. Some would ramp in or out with color and density shifts. It was a random problem that had a big visual impact. The opening titles were another area of challenge. Painstaking work was involved in solving the problem. The color breathing in the elements was awful and distracting. To fix this, I keyed the titles for independent control from the backgrounds and did single frame corrections to even out the density and color shifts of the foregrounds and backgrounds.

What are you most proud of with this restoration?

My proudest moment took place in a color review screening. In the night scene when Maria and Captain Von Trapp are dancing in the gazebo, I overheard someone say, “This is beautiful; I’ve never seen it look so good.” That was gratifying. The detail in the image was incredible. It’s a thrill to know how good this version is, and the enjoyment it will bring to people for a long time.

Can you talk about your process/workflow on this project?

I like to view the material as many times as possible. Each pass allows me to see something different and refine corrections. For me, it’s an on-going process of strategy discussions and screenings to get notes on what and how to trim, or notes about a version with clean-up work, and then to color and cut in the repair work.

What tools did you use?

For color, editorial updates and some VFX work, I used Quantel Pablo in 4K.

How long did the project take?

From first evaluation until final DCP screening, the project was in-house for approximately six months.

Thought Gallery Channel:
Creative Master Series

Oscar-winner Ben Wilkins on Whiplash’s Audio Mix, Edit

This BAFTA- and Oscar-winner walks us through his process.

When I first spoke with Ben Wilkins, he was freshly back from the Oscar-nominee luncheon in Hollywood and about to head to his native England to attend the BAFTAs. Wilkins was nominated by both academies for his post sound work on Sony Picture Classics’ Whiplash, the Damien Chazelle-directed film about an aspiring jazz drummer and his brutal instructor.

Wilkins (@tonkasound) didn’t return to LA empty handed — he, along with fellow sound re-recording mixer/co-supervising sound editor Craig Mann, and production sound mixer Thomas Curley, brought home the BAFTA in the Sound category.

As their titles imply, Wilkins and Mann, both based out of Technicolor Sound on the Paramount lot in Hollywood, had dual roles on Whiplash. This is actually a growing trend in Hollywood — one person, multiple disciplines. “It used to be that you needed a very specific set of skills; it was very specialized,” says Wilkins. “But now it’s more democratic, thanks to the democratization of the tools.”

I asked Wilkins if he was enjoying this trend or if he’d prefer to focus on just one aspect of the audio post. It seems Wilkins might be a control freak, and I mean that in the best possible way. “If it was up to me, I would want to record the sound on set as well, and I have done that before. To be able to see a project through — from inception all the way through post production to the theater — is a huge privilege, but one that doesn’t happen very often.”

While this elusive process of taking it from to start to finish didn’t happen on Whiplash, Wilkins and Mann’s workflow on the film didn’t miss a beat. In fact, Wilkins likens his work as a mixer and editor to that of a sculptor. “When I’m editing, it’s like I am putting matchsticks together to build a giant block of wood in the shape of whatever sculpture I am doing. Then when I switch to mix mode, it’s like I’m taking a blade or chisel and removing extraneous sound that doesn’t advance the story and doesn’t help the audience emote.”

Ok, now let’s dig into Whiplash’s audio post workflow.

How did you get involved with Whiplash?

Craig and I had worked for the production company, Jason Blum’s Blumhouse Productions, before. They have an existing relationship with Technicolor Sound and we were able to accommodate their schedule and their budget.

How did you work with the director? How did you guys communicate?

It was a good relationship. We had a very long initial meeting with him in the editing room. We watched the film and talked about how we were going to handle things. As I mentioned, the schedule was very tight, so we quickly developed a sense of Damien’s audio shorthand and what he was feeling and what he wanted to hear.

He was extremely decisive in how he wanted things to sound. He had a very definite idea in his mind before he heard anything. He knew what he wanted – the character in film is essentially based on him, so he knew what specific rooms and situations should sound like.

What’s an example of a direction that he gave you?

A big one involved the practice rooms, or the band rooms, which were mostly subterranean. We were based in New York and they were underground and sort of womb-like, and there wasn’t a lot of outside sound — that was something he wanted.

In an earlier version of the film, we had a lot of New York sounds: sirens, cars, horns and the usual sort of noise. In general, it sounds very loud and very pervasive, even in interiors. Damien was very sensitive to those sounds, and we ended up removing nearly all the background when we were inside the practice rooms. He was right. To hear sirens of a police car go by while someone is sitting, waiting for a teacher to show up for a drum lesson isn’t necessarily advancing the story.

So complete focus on the characters? No outside intrusions?

Yes, almost like a vault or a temple or a church. Somewhere very peaceful, where the musical instruments and the people inside the rooms were making all the sound.

L-R: Craig Mann and Ben Wilkins on the mix stage at Technicolor Sound.

How did you and Craig split the work?

He handled editorial for dialogue and ADR. Actually, we both worked on the dialogue and ADR, and then I handled the Foley, the background, all the sound effects and all the sound design. That was how we divided up the editing work. We also made fine adjustments to the music whilst mixing.

Can you walk me through your process?

We got a cut that was pretty close from the picture editor Tom Cross, and we had about 20 or 22 sound rolls, which we loaded in. We assembled the dialogue from dailies using SynchroArts Titan software and assembled that into Avid Pro Tools sessions. Same with the Foley and ADR; basically everything was recorded into Pro Tools.

So we recorded the ADR and Foley. Then I recorded some background, specifically for this show — a lot of the background involved musical instruments being played off screen, or musicians tuning their instruments and bands warming up off camera. There is a musicians’ union band practice room quite close to the studio, audible from the street.

We then took that library of sounds and started editing to picture. We prepped all the tracks to picture and after about five weeks, we took it down to the mixing stage here at Technicolor. Using the Euphonix S5 Fusion console, we then mixed all the material we prepared, along with the new music and the old music, into the final mix.

What do you think stood out about this film in terms of its sound? What made BAFTA and the Academy take notice?

No matter how good the sound is, I think all of the films nominated this year have some emotional component that spoke to the viewer and helped them really key in to certain sounds that resonate within the soundtracks of these films.

When you’ve got a film that’s about people playing instruments, and the relationship between those people who play, their actions become incredibly key to their story, and in this case it was really enhanced by the emotional content of the soundtrack.

How much of the actor’s drumming performance was post-sync?

That’s a tricky question to answer, but I’d say about 20% of the drumming in the soundtrack was recorded on the set. About 60% of the drumming was pre-recorded and played along to, and then about another 20% of the drumming was recorded afterwards.

Did the lead actor Miles Teller actually play the drums on camera?

Miles took a lot of intensive training lessons before the filming started, and he was at a pretty high standard. The thing about the film is that these players are exceptional. I’ve used the analogy of Natalie Portman’s ballerina in Black Swan. It’s a similar situation here. These people have been practicing and honing their skills for years, so unless you can find a drummer who can act or a dancer who can act, you’re only ever going to approximate or get some sort of portion of the truly excellent performance.

The person who played the drums we hear in the film, did they perform to picture?

Yes and no. That professional drummer played ahead of time. In other words, there were scenes where there was pre-recorded music that was played back on set, and he played those scenes.

Afterwards, we called it Drum ADR — there was automated drum replacement recordings where we went back and he did play to picture. It was very challenging for him. It was not something he had done before.

Were reverbs used to put the post-performance drum parts into the scene?

Yes. Very special reverbs were used. We went on set and recorded impulse responses. In other words, we made computer models of the reverbs — the real way the room sounded on set. Both of the mixers, myself and Craig, were able to be perfectly in sync, audio-wise, in terms of what reverbs we were using for dialogue and ADR, music, Foley and effects.

All Whiplash Photos Courtesy of Sony Pictures Classics.

Thought Gallery Channel:
Creative Master Series

Making ‘Being Evel’: James Durée Walks us Through Post

Compositing played a huge role in this documentary film.

Those of us of a certain age will likely remember being glued to the TV as a child watching Evel Knievel jump his motorcycle over cars and canyons. It felt like the world held its collective breath, hoping that something horrible didn’t happen… or maybe wondering what it would be like if something did.

Well, Johnny Knoxville, of Jackass and Bad Grandpa fame, was one of those kids, as witnessed by, well, his career. Knoxville and Oscar-winning filmmaker Daniel Junge (Saving Face) combined to make Being Evel, a documentary on the daredevil’s life and career. Produced by Knoxville’s Dickhouse Productions (yup, that’s right) and HeLo, it premiered at Sundance this year.

Director Junge (who shares writing credit with his editor Davis Coombe) has a little daredevil in him too, choosing to walk a bit of a tightrope when it came to how he wanted to present the film — ultimately, he ended up putting 60 interviewees in front of a greenscreen while archival clips of Knievel’s stunts played in the background. The interviews were shot all over the country in a variety of locations.

James Durée

As you can imagine this format relied on post production, compositing in particular, to play a big role. So we reached out to compositor James Durée from Denver’s Milkhaus, which provided post production services for Being Evel. Milkhaus and Durée, who provided some additional animation to the film as well, have a history working with Junge and editor Davis Coombe, so they got the call early.

You were brought on before shooting began?

Yes, once Junge sold the idea, we started running some tests to see if we were going to pull off his idea of having all of the archives run on the theater screen behind the people being interviewed. So, it’s all done with greenscreen.

Production flew around the country and shot the subjects with Blackmagic Cinema Cameras, for the most part, and on various greenscreens. Then we shot plates here locally at the Paramount Theater to composite the interviews in. Then we did a composite of the archive rolling behind them for the effect.

Greenscreen shots come with their own set of challenges — what colors and clothes people are wearing, lighting, etc. — but add different screens to the equation and that takes it up a notch.

You can never really control what people are wearing! The surprising thing was the difficulty of controlling the type of greenscreen that was being provided at these locations. They were all over the place in terms of the color of green that we had to key.

Credit: Las Vegas News Bureau

Sometimes we had more than one color of green within one shot! I think in one of them there was three or four different colors, and some of them were really more blue than green. They weren’t blue or green. There were a lot of variables to play with, but, thankfully, they were great about measuring to make sure they were setting up the same way each time.

Had you experienced anything like this before?

No. They did somewhere around 60 interviews; it was quite an undertaking. I don’t think that anyone’s really done this in documentary filmmaking to this extent. There was one that came out recently that had maybe six different interviews. We had four camera angles and probably 20 to 25 interviews that were actually used within the film.

How did you go about fixing the greenscreen issues and making the composites look good?

We used Primatte, Keylight and Key Cleaner quite a bit, as well as After Effects. We also called on DaVinci Resolve. The production shot in ProRes on three Blackmagic cameras and one Canon C300. All of them were in log (so flat, shot without the Rec 709 applied, which would have made it look like video.) We used DaVinci to create look-up tables for each person and each angle to get them out of the log color space and into something that we thought we could key. It was always a fight on using these LUTs to bring them into a place where we could get a fairly clean key while not introducing too much noise and digital artifacts.

Once we had those LUTs, we would key them with any number of keyers, depending on the shot. Even though they were all in these studio settings, it always seems like some variable was making it not work like an identical shot from earlier in the frame. Then we would use DaVinci to create a second look-up table to bring it into a color where we thought was maybe 98 percent of the final color of the composite. Then we would render them out and bring them into DaVinci to do a final color pass on the full composite plates, but with the people in the environments.

We were hopping in and out of DaVinci and After Effects and Premiere quite a bit to push and pull these different shots so that in the end it all looks like they were shot in one environment.

So the film was edited in Premiere?

Yes, primarily because of the integration of Premiere and After Effects — being able to edit in multicam and also take advantage of the story scripting function, Adobe StoryYou could get transcriptions of what had been said in the interviews, so you could see the words. This allows you to jump through the footage and find what you need to start telling the story. Then they could pick the angles on the fly as they wanted.

While it was advertised more simply than it ended up being, we were able to get from Premiere into After Effects with our reels fairly easily. We then started doing the initial keys and compositing them to different plates on the footage behind them.

Can you talk more about using Primatte, Keylight, Key Cleaner? Are these automated to a point and then you have to go in and noodle?

They have an auto button, but I have yet to get it to work. Some of them are built-in plug-ins that Adobe has either licensed or bought and included in their package. Some of them are plug-ins that are sort of the industry standard. For example, Primatte is used in Nuke quite a bit for the high-end Hollywood composites, and Red Giant ported it over to be used in After Effects. It allows you to use a visual interface to start selecting the things that you don’t want or the ones you want to keep in to push and pull the different parts of the matte until you get a key.

There is still a decent amount of finessing involved?

Probably on average we were spending at least 40 minutes per angle and per person to get an initial key that we used to create presets that we would then drop in as we got that angle again later in the film. Then we would tweak them because the majority of the people in the film are older and have white hair, which just absorbs all the green around them. Their hair really wanted to go with all the background. The spill was really prevalent throughout the whole shot. Sometimes you had to tweak it around. Some of these set-ups were four or five different processes to get one clean matte to then key them.

Imagine if one of those white-haired guys showed up in a green shirt?

Ha, luckily, no one wore a green shirt, but there were some that were wearing beige suits that apparently had some green tones in them — we discovered this when we dropped a color meter on them. We did a lot of garbage matting as well, because all of these guys have glasses… anything that’s reflective. Sometimes it looks right just dropping it in, and other times you have to cut it back in because you don’t want to key off that part.

Let’s talk about the archival footage and all the different formats? I guess that’s where Premiere came in as well?

Yes, that’s helpful, but when you have to go re-conform all that for deliverables —ultimately this will get distribution through A&E and History — they’re going to want all of it in 23.98fps ProRes HD conformed frames. We had Super 8. We had HDCAM. We had Beta. We had some DVDs, some VHS. It was all over the place. Some came in already captured into a QuickTime, but they’d done it 10 years ago, so some of the codecs were just really old. We’d have to figure out what codec was being used so we could get it to run through the Blackmagic Teranex.

How were you using the Teranex?

We were using it to get it all into 23.98fps because our media was in various framerates. We did have some 18fps media that we had to telecine down the 25fps from the BBC. The 29.97fps footage was from prior TV runs like ABC‘s Wide World of Sports, and Evel Knievel had done a documentary himself and that one came in on some 1-inch tape. We were just constantly troubleshooting, trying to figure out the best way to get it into a more standard format that the Teranex could then push through and do the upresing and conversions for us.

I like Blackmagic’s latest version of Teranex because we can do at least a basic color balance before it’s even brought it in. We can make sure we capture it in a more neutral true color, which makes it easier when it comes to the final color correction.

I’m assuming the integration between Blackmagic Media Express and Teranex helped the workflow?

Yes, but ultimately you’re capturing the footage and then the editors are using it in whatever program they choose. We use Avid, Final Cut 7, Final Cut X and Premiere. Depending on what project we’re doing, we try to pick the one that we think is going to give us the best throughput for the project’s workflow. Ultimately on all of those, it’s how each system handles the hand-off in the DaVinci that makes it easier.

The Thunderbolt connection must be helpful.

Absolutely. With Thunderbolt we can plug them [the Teranex] into the new Mac Pros and capture that footage using Blackmagic’s Media Express, their capture program. It keeps the overhead on the processors down, and you see a lot less issues on capture with dropped frames and bad playback. It’s come a long way from the days of capturing from decks onto the older Macs.

The thing that I really love about the Teranex with Thunderbolt is that whatever you’ve set in the program it sets on the Teranex, so you’re not thinking that you’re capturing in one format and actually getting another. The two talk to each other and make sure they’re in sync. When you are working these long hours, fatigue sets in and you start making mistakes that you wouldn’t otherwise make. It helps to eliminate some of those potential mistakes of mismatching frame rates and codecs when you’re capturing.

Anything else that you would like to add about the workflow on Being Evel?

The entire film was greenscreened, so unless we’re showing full-frame archive, everything that you’re looking at is either done in After Effects as an animation or it’s done in After Effects as a final composite — putting people into this environment. I think it’s a pretty unique process of documentary filmmaking. Normally you set up in an office, and you shoot what you see.

This workflow, for better or worse, allows you to noodle a lot longer because you can move people around. You can really tweak what’s going on in the background. It lends a whole other layer to the storytelling. I think it’s fascinating to sit there in the theater and watch as people are talking and seeing this archive playing behind them.

Most of the archival shots of Evel Knievel are courtesy of K&K Promotions.

Thought Gallery Channel:
Creative Master Series

Stuck On On Takes Sizeable Post Challenges of “Boyhood” w/ SCRATCH

Parke Gregg, co-founder and chief colorist at Stuck On On, met Richard Linklater while doing the challenging post-production for the “Slacker” tribute that was sponsored by the Austin Film Society, of which Linklater is the founder. The two later connected when Parke did the full post and DI for “Up to Speed” episodes that ran on Hulu, followed by Linklater’s highly acclaimed feature film, “Before Midnight.” Most recently Parke did the full post-production and DI for Linklater’s latest film, “Boyhood.”

In a recent interview Parke discussed his work for “Boyhood” and his digital workflow and tools.

Q:  What made the post-production and DI for “Boyhood” so challenging?

A:  The simple answer is “everything.” But I think it’s pretty clear that when you have a long film (ten reels), shot on 35mm film for a few days every year over a span of twelve years — shot by two different DPs (Lee Daniel and Shane F. Kelly) using different film stocks and an off-line edit in SD at 29.97 — there are going to be multiple challenges.

For example, framing is typically something that is locked at the onset of a project, aside from a few re-frames for creative purposes. However, when a project has ever-changing gear and crew, things you take for granted tend to change as well. For each year of footage the framing was different and framing charts were only occasionally available. I had the telecine off-line footage to go by, but again, different operators/gear eliminated any hope of a standard framing for the project. Often the offline didn’t even match the framing charts when available, so it became a subjective matter. 

Some were shot at 4 perf and some at 3 perf as well. Some framed for an optical track, some not. This, like many other aspects of the DI, became a manual and tedious process. We had the full frames scanned at 2.5K so we would have plenty of resolution for cropping and framing and still make a 2K delivery. Fortunately, SCRATCH has great tools for handling this, whether the task is mostly automated or significantly manual.

Another issue was matching back the time code to the film negatives. Fortunately, assistant editor Mike Saenz did an amazing job of working with Cinelicious to get the film scans completed correctly. Cinelicious needed an EDL, not a keycode cut list, for their scanning process. The problem was that because tape dailies were used, with multiple lab rolls on each tape, the EDLs would have no intrinsic relation between keycode and time code, or between lab rolls and tape numbers. To correlate the two sets of information, Mike had to find the hole punch at the beginning of each lab roll or a significant frame and match it back to the dailies time code and tape number. Cinelicious would then assign this time code to each roll that ultimately matched the EDL. Again, it turned into a very manual and tedious process. 

Back at Stuck On On, we converted the EDLs to 24fps and then took on the challenge of conforming the scans and matching it back up to the offline. By the nature of a reverse pull-down at edits, you lose or gain a frame here and there. This usually washes out in the end, but when working with this many reels we had to be very careful not to accumulate extra frames that would cause audio sync problems when all was compiled into a single timeline. It’s funny how just a few years ago, working in a 29.97 offline environment was normal, but now it’s totally archaic and we really had to dust off the cobwebs to remember how all this could work.

The schedule was another considerable challenge. The edit for the final year wasn’t locked when we started the DI. Rick had just wrapped on the last two scenes when I began working on the conform in late August (2013). Also, the edit was “malleable,” so periodically updated edits or new scenes were coming in. In addition, the scans from Cinelicious were coming to us in batches as well as new scans for editorial updates. So throughout the first part of the project, we didn’t have all the elements and we needed to stay flexible to incorporate new components, which all required a lot of organization. Allison Turrell is my business partner and also our DI Producer. Having her is absolutely key to successfully pulling off big projects like this for a small shop like us.

Q:  How did you create a cohesive look with film shot over 12 years and by two different DPs?

A:  Sandra Adair is the co-producer and has been Rick’s editor since his second film, “Dazed and Confused.”  He trusts her decisions and she puts her all into driving the process. She did a masterful job of editing all the film into a smooth and cohesive story. Once the edit was locked she moved into a creative-producer role and was very hands on during the conform and color grading process. 

Rick wanted to establish a very natural, real-life, human feel to the film  not over stylized in any way. Sandra, he, and I collaborated on defining that look and it naturally evolved over the course of the project. Most people who’ve seen the film comment on how smooth it feels, how the years just blend together. This is largely due to the excellent editing, but two primary goals of mine were to ensure that the look of the film enhanced this seamlessness and to minimize visual distractions that were sometimes a result of this unique production.

Rick’s work style is very collaborative and he put a lot of trust in us. He gave global comments and relied on us to make it happen. During review sessions, he would correct us if we were on the wrong path, but made it clear that he wants our input and he gives everyone he works with a lot of latitude. This can be very invigorating, but it also means you hold a lot of responsibility.

I really enjoy this phase of post-production, the challenge of contributing to the creative component of the film and enhancing the storytelling. Of course there’s the technical component, which is also rewarding, but SCRATCH’s tools really ease the tricky aspects of a DI, while allowing for more attention to the creative.  

Q:  Tell us more about the technical challenges for “Boyhood.”

A:  The entire post process is a testament to problem solving, there’s always a way to get something done. I had a tremendous amount of material to get into good shape, which required a significant amount of time and energy in the post process — removing the dirt, grain, noise, blemishes, and adjusting the focus. The color was no less significant but it was more about creating a consistency and removing distractions to make the story shine.  The SCRATCH tool set allows us to push the envelope in color grading and finishing, and make changes in real time so that the workflow is smooth and seamless. 

Q:  How did you manage the visual effects?

A:  We worked with Nick Smith who handled the heavy lifting of the more traditional VFX work like green-screen replacement and helicopter-shadow removal. On several shots, he would send me his work with alpha channels so I could do the final composite in SCRATCH while retaining full color control of the background plate and VFX separately. This was very beneficial and an efficient way to maintain a consistent, natural look for these scenes. I was able do several of the remaining visual effects directly in SCRATCH during the DI. This involved microphone/boom removal, speed shifts, poster and artwork replacement, screen replacement, etc. 

At the very end of the project, there were some copyright issues with logos and posters seen in the background of a couple scenes. We were already at the deadline for final delivery, so again it proved very valuable to have these editing and compositing tools directly in SCRATCH. I was able to replace posters/artwork, track camera movement, track and mask people walking in front of it, and make a single, first-generation render of the color and VFX changes, all at the same workstation. This also allowed us to keep the same file structure/naming convention as previous renders, which is huge when working with large image sequences. This film has almost 241,000 frames.

Q:  Given all the challenges of this film, did you have adequate time to do all the post and DI?

A:   Actually this was another considerable challenge. The decision had not been made to go to Sundance until the end of December so we all needed to pick up the pace to meet that deadline. A version for screening was sent off to Sundance and later played at the Berlin International Film Festival. There, Rick took home the Silver Bear Award for Best Director, which was exciting but our work was not complete. Starting again in March, we performed another complete color pass, as well as a considerable amount of dust-busting and added several additional VFX shots. An equal amount of audio work was being done as well. This was all working towards a theatrical distribution beginning in June.

Q:  What were your final deliverables?

A:  DCP was the primary final deliverable. For the early screenings, we did the translation to P3 XYZ directly in SCRATCH. It is incredibly convenient to have good color-space management tools built into SCRATCH. However, at the end we delivered RGB Tiff sequences that another facility used to generate DCP, HD-CAM, and a film-out for the production’s archive. 

Thought Gallery Channel:
Creative Master Series

The A-List: “The Girl on the Train” director Tate Taylor

Tate Taylor, a Mississippi native who began his career as an actor, had just one small comedy — 2008’s “Pretty Ugly People” — on his directing resume when that part of his career got turbo-charged thanks to his 2011 Oscar-winner “The Help”, which he also co-wrote and co-produced. Next he tackled another story dear to his heart and close to his roots: “Get On Up”, the warts-and-all biopic of James Brown, the Godfather of Soul, which he co-produced with Mick Jagger and Brian Grazer.

Director Tate Taylor on set.

Now, for his fourth feature, Taylor has plunged headfirst and even deeper into the murky depths of twisted human behavior in the highly anticipated mystery-thriller “The Girl on the Train”. Starring a large ensemble cast (Emily Blunt, Luke Evans, Edgar Ramirez, Justin Theroux, Allison Janney, Lisa Kudrow), and based on the bestseller by Paula Hawkins, the Universal release explores obsession, revenge, sex, lying, desire, pain and addiction — it tells the story of a lonely woman (Blunt) who is unraveling after the breakup of her marriage and spiraling into alcoholism.

I spoke with Taylor about making the film and his process.

What do you look for in a project and what attracted you to this, as it’s a bit of a departure for you?

You’re right, as there’s nothing funny about this, and I like to have some comedy. I always look for story and lots of it, with lots of intertwining characters and character work, and I usually like stories that allow me to mix up drama and comedy.

I was a big fan of Robert Altman from a young age, and he’s been a big influence with me. I love it when comedy and drama and pathos are all mixed up together scene-wise, where you never see one or the other coming. I was thrilled about doing this because, although it’s a genre film, there’s so much character work and story to it.

Like “The Help, this is a story of women and their intertwined lives. Fair to say that women-centric stories really appeal to you?

They do, but it’s funny because I can truly say I never think about the sex of characters. It just worked out that way.

Did you feel any trepidation about taking on the movie, making changes to the much-loved novel and upsetting its fans?

Not to sound arrogant, but I don’t worry about that one bit. If I make it truthful and well-done, then I’m doing my job. And I didn’t abandon the novel. I really respected it, and the changes we made I feel just worked better for the film.

What were the biggest technical challenges in making it?

One of the big ones was that quite a lot of the story in the novel takes place at dusk, and it’s just technically tricky to schedule that look on a shoot since you don’t get a nine-hour twilight. I also didn’t want my crew having to do weeks of night shoots in January in the freezing cold. The other big one was dealing with all the train footage. We shot some of it practically with the Metro North, up and down the Hudson, and then had a real car on stage in Yonkers and shot all that with greenscreen.

Tell us about the shoot. How long was it and how tough?

It wasn’t too bad. We had a three-month shoot, and the main thing was that we did a lot of prep. Everyone was prepared, which helped a lot, as it was a film that really needed extensive prep.

Can you talk about working with a woman DP, Charlotte Bruus Christensen?

I wish I could say that there was a political reason for using a woman DP, and helping the diversity cause, but I didn’t think about her gender when I hired her. We had a start date, she was on a list of available DPs, and after we met I just felt she was the right DP for this. As it turned out, I think having a woman shooting the more risqué scenes with the actresses was a big help. I think they were far more comfortable with her than some guy in a baseball cap (laughs).

Your editor was Mike McCusker, who cut “Get On Up” for you, “Walk the Line” and “The Amazing Spider-Man”. Tell us about the editing process. Was he on set?

He visited the set a little and we have a great relationship. He knows how I think, we have the same tastes, and he anticipates things. There was a lot of stuff with the tunnel scenes and some very trippy, acid-flashback kind of scenes, and I had him come out for all that, to make sure we had the right coverage.

Do you like the post process?

I love it, but then I love all parts of the process — from writing and casting to shooting and editing. Of course, post is crucial as it’s where you really make your film.

Where did you do the post?

It was all done — full offline editorial services — in New York at Harbor Picture Company.

How many VFX were there and what was involved?

There were several hundred shots, mainly to do with the train work and creating the whole world outside of the window. Then we had the three main houses that were supposed to be overlooking the Hudson, along the train tracks. But that doesn’t exist, so we found three perfect houses on the fairway of an abandoned golf course, and then used VFX backgrounds to give us the Hudson and so on. Technicolor and Phosphene did all the VFX.

Tate Taylor

Tell us about the audio and music.

They’re always crucial and I never want the music to sound too traditional or predictable, and with this so much is inside all the three women’s heads, and there’s a lot of second-guessing and claustrophobia. Everyone’s unreliable, and I knew a traditional lush score would just stick out, so Danny Elfman was a perfect match as composer. He told me he’d never done anything like this in his whole career.

Where did you do the DI? Are you a big DI fan?

We did it at Technicolor Postworks in New York (with Mike Hatzer who used Lustre), and I was pretty involved with it and working on the look together with the DP, and it was pretty great. I really wanted the film to be totally dark, and there’s a lot of jumping around and flashbacks, and we were able to do some very subtle things to enhance various scenes. And Universal really embraced the palette we chose which really pleased me, as this doesn’t look like your normal studio movie. People have told me it looks ‘European,’ which is a very big compliment. (Laughs)

Did the film turn out the way you first envisioned?

It actually did. It’s such a long, arduous process to get to that point, but it is how I first envisioned it. I’m thrilled.

What’s next?

I’ve got a lot of different projects in development, including Versailles ’73, and I’m still writing and developing a film called Tupperware, which is basically about the woman who started the Tupperware party but who in reality began the feminist movement. It’s a fascinating tale and she was way ahead of her time. I’m also working with MGM on a project titled In the Heat of the Night for a contemporary TV series, so I’ve got a lot happening right now and some great options. You never know which one will take off. Until I’m on the set, at craft services, I never believe it.

Thought Gallery Channel:
Creative Master Series

Review: Avid Media Composer 8.5 and 8.6

It seems that nonlinear editing systems, like Adobe Premiere, Apple FCP X, Lightworks, Vegas and Blackmagic Resolve are being updated almost weekly. At first, I was overjoyed with the frequent updates. It got to the point where I would see a new codec released on a Monday and by Friday you could edit with it (maybe a slight exaggeration, but pretty close to the truth). Unfortunately, this didn’t always mean the updates would work.

One thing that I have learned over the last decade is that reliable software is worth its weight in gold, and one NLE that has always been reliable in my work is Avid Media Composer. While Media Composer isn’t updated weekly, it has been picking up steam and has really given its competitors a run for their money.

Avid Media Composer

With Avid Media Composer’s latest updates, including 8.5 and all the way through 8.6.1, we are seeing the true progression of THE gold standard in nonlinear editing software. From the changes that editors have been requesting for years, like the ability to add a new track to the timeline by simply dragging a clip, all the way to selecting all clips with the same source clip color in the timeline (an online editor’s dream — or maybe just mine), Media Composer is definitely heading in the right direction. Once they fix options, such as the Title Tool, I am sure many others will be in the same boat I am. Even with Adobe’s latest update news of Team Projects, I think Avid’s project sharing will remain on top, but don’t get me wrong, I love the competition and believe it’s healthy for the industry in general.

Digging In

So how great are the latest updates in Media Composer? Well, I am going to touch on a few that really make our lives as editors easier and more efficient, including the new Source Browser; custom-sized project creation Preset Manager; Audio Channel Grouping; grouping clips by audio waveform; and many more.

For simplicity’s sake I won’t be pointing out which update contained exactly what, so let’s just assume that you and I are both talking about 8.6.1. Even though 8.6.2 was released, it was subsequently pulled down because of a bad installer and replaced by 8.6.3. Long story short, I did this review right before 8.6.3 was released so I am sticking to 8.6.1. You can find the read me file for any 8.6.3 related bug fixes and feature updates, including Realtime EQ and Audio Suite Effects.

Source Browser

Let’s take a look at the new Source Browser first. If you have worked in Premiere Pro before then you are basically familiar with what the Source Browser does. Simply put, it’s a live access point from within Media Composer where you can either link to media (think AMA) or import media (the traditional way). The Source Browser is great because you can always leave it open if you want, or close it and reopen it whenever you want. One thing I found funny is that there was not a default shortcut to open the Source Browser — you have to manually map it.

Nonetheless, it’s a fast way to load media into your Source Monitor without bringing the media into a bin. It even has a Favorites tab to keep all of the media you access on a regular basis in the same place — a good spot for transition effects, graphics, sound effects and even music cues that you find yourself using a lot. The Source Browser can be found under the Tools menu. While I’ve seen some complaints about the menu reorganization and the new Source Browser, I like what Avid has done. The updated layout and optimized menu items seem to be a good fit for me, it will just take a little time to get used to.

Up next is my favorite update to Media Composer since I discovered the Select Right and Select Left commands without Filler and how to properly use the extend edit function: selecting clips in the timeline based on source color. If you’ve ever had to separate clips onto different video and audio tracks, you will understand the monotony and pain that a lot of assistant editors and conforming editors have to go through. Let’s say you have stock footage mixed in with over two hours of shot footage and you want to quickly raise all of the clips onto their own video layer. Previously, you would have to move each clip individually using the segment tool (or shift + click a bunch of clips), but now you can select every clip with the same source color at once.

First, you should (or at least I recommend that you should) enable Source Color in your timeline, but you don’t have to for this to work. Second, you use either the red or yellow segment tools or alt (option) + click from left to right over the clip with the color that you want to select throughout the timeline. Once the clip is selected you will right click on the clip. Under the Select menu, click on Clips with the Same Source Color. Every clip with that same color will be selected and you can Shift + CTRL drag the clips to a new track. Make this a shortcut and holy cow — imagine the time you will save!

Immediately, I think of trouble shots that might need a specific color correction or image restoration applied to them like a dead pixel that appears throughout a sequence. In the bin, color the trouble clips one color, select them all in the timeline and bam you are ready to go, quickly and easily. This update is a game changer for me. Under the Select menu you will see a few other options like Offline Clips, Select Clips with No Source Color, Select Clips with Same Local Color, and even Reverse Selection.

Audio

Now let’s jump into the audio updates. First off is the nesting of audio effects. I mean come on! How many times have I wanted to apply a Vari-Fi effect at the end of a music cue and add D-Verb on top of it?! Now I can create all sorts of slow down promo/sizzle reel madness that a mixer will hate me for without locking myself into a decision!

I tried this a few times expecting my Media Composer to crash, but it worked like a champ. Previously, as a workaround, I had to mixdown the Vari-Fi audio (locking me into that audio with no easy way of going back) and apply the D-Verb to the audio mixdown. This isn’t the cleanest workflow but it guaranteed my Vari-Fi would make it into the mix. Now I guess I will have to trust the mixer to not strip my audio effects off of the AAF we send them.

Digging a bit further into the audio updates for Media Composer 8.5 and 8.6, I found the ability to add up to 64 tracks of audio and, more specifically, 64 voices. Sixty-four voices can be laid out in these possible combinations: 64 mono tracks, 32 stereo tracks, 10-5.1 tracks plus four mono tracks or even eight 7.1 tracks.

Let’s be honest — from one editor to another — do we really need to use all 64 tracks of audio? I urge you to use this sparingly, and only if you have to. No one wants to be scrolling through 64 tracks of audio. I am hesitant to totally embrace this, because while it is an incredible update to Media Composer, it allows for editors to be sloppy, and nobody has time for that. Also, older versions of Media Composer won’t be able to open your sequence as they are not backwards compatible with this.

My second favorite update in Media Composer is Audio Groups. I am a pretty organized (a.k.a. obsessive-compulsive editor), and with my audio I typically lay out voiceover and ADR on tracks 1-2, dialogue on 3-6, sound effects on 7-12 and music on 13-16.

These have to be fluid, and I find that these fit my screen real estate well. They keep my audio edit as tidy as possible, although now with 64 tracks I can obviously expand. But one thing that always sucked was having to mute each track individually or all at once. Now, in the Audio Mixer you can easily create groups of audio tracks that can be enabled and disabled with one click instead of individually selecting each audio track. For instance, I can group all of my music tracks together to toggle them off and on with one check box. In the Audio Mixer there is a small arrow on the upper left that you will twirl down, select the audio tracks that you want to group, such as tracks 13-16 for music, right click, click Create New Group, name it and there you go — audio track selection glory.

Last in the audio updates is Audio Ducking. When I think of Audio Ducking I think of having a track of voiceover or ADR over the top of a music bed. Typically, I would go through and either add audio keyframes where I need to lower the music bed or create add edits, lower the audio in the mixer, apply a dissolve between edits and repeat throughout the segment.

Avid has really stepped its game up with Audio Ducking because now I can specify which of my dialogue tracks I want Avid to calculate for when my music bed is playing. You can even twirl down the advanced settings, adjust threshold and hold time for the dialogue tracks, as well as attenuation and ramp time for the music bed tracks. I tried it and it worked. I won’t go as far as to say that you should just use that instead of doing your own music edits, but it is an interesting feature that may help a few people.

Wait, There’s More

There were a few straggling updates I didn’t touch on you will want to check out. Avid has added support for HDR color spaces, such as RGB DCI-P3, RGB 2020 and many more. Once I get my hands on some sweet HDR footage (and equipment to monitor it) I will dabble in that space.

Also, you can now group footage by audio waveform. While grouping by audio waveform is an awesome addition, especially if you have previously used Red Giant’s PluralEyes and feel left out because they discontinued AAF support, it lacks a few adjustments that I find absolutely necessary when working with hours upon hours of footage. For instance, I would love to be able to manually sync clips that don’t have audio loud enough for Avid to discern properly and create a group. Even more so, for all grouping I would really love to be able to adjust the group after it has been created. If after the group was created I could alter it inside of a sequence that would immediately reflect my changes in the group itself, I —along with about one million other editors and assistant editors — would jump for joy.

Lastly, the Effects Tab has been improved with its Quick Find search-ability. Type in the effect you are looking for and it will pop up. This is another game-changing feature to me.

Summing Up

For a while there I thought Avid was satisfied to stay the course in 1080p land, but luckily that isn’t the case. They have added resolution independence, custom project resolutions, and while they have added features to Media Composer — like Source Browser and the ever-improving Frame Flex — they kept their project sharing and rock solid media management at the top level.

Even after all of these updates I mentioned, there are still some features that I would love to see. Those include built-in composite modes in the Effects Pallette; editable groups; an improved Title Tool that will work in 4K and higher resolutions without going to a third-party for support; updated Symphony Color Correction tools; smart mix-downs that can inherit alpha channels; the ability to disable video layers but still see all the layers above and below; and many more.

If I had to use just one word to describe Media Composer, I would say reliable. I love reliability more than fancy features. And now that you heard my Media Composer review, you can commence trolling on Twitter @allbetzroff.

Thought Gallery Channel:
Creative Master Series